If you are using split bases, shafts and capitals, be sure to mark each set so that you can keep the matching halves together later on, during assembly.
 Critical Ventilation Details
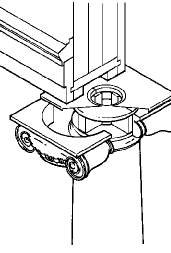
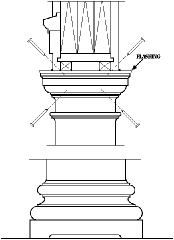
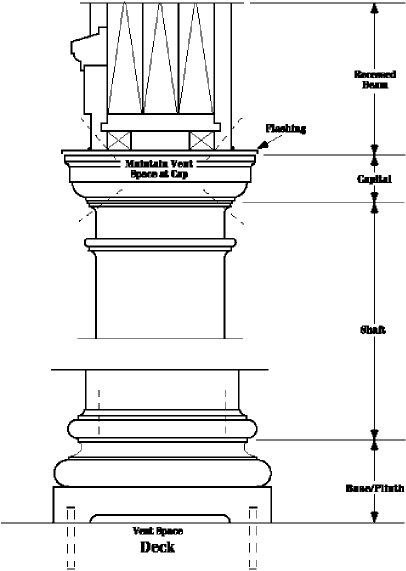
Ventilation must be provided at the top of the column by the installing contractor. All warranty claims will be voided if columns are not properly ventilated as shown at right.
Acclimating, Storage & Handling Instructions
Exterior wood columns must be stored in a secure, dry, and well-ventilated area. Columns should not to be stored under a plastic tarpaulin as moisture may collect from the atmosphere and may damage the column. The column shaft should be raised off the ground so that air circulates around the column. Column shafts, wooden pillars, or wooden components should not be stored in direct contact with concrete or other masonry.
If our standard primer and asphaltum coatings are not factory applied, all wood components should be painted with two coats of a high quality oil based primer prior to delivery to the job site. Also, asphaltum paint should be applied a minimum of three feet up the inside of the shaft, and on the inside walls of a wood base.
Be sure to keep any column components that are split for reassembly paired with their matching halves. Failure to keep matching halves together may have detrimental effects on reassembly.
Interior wood columns need special care during storage and installation. One issue is the possibility of rapid changes in the normal moisture content of the wood or extreme moisture conditions, too high or too low. This is especially true in the winter months where we ship from our plant where the environmental moisture is normally somewhat high to very low moisture locations of the country. Extreme environmental dryness may create problems with woodwork more serious than those created by too much moisture. Under normal conditions the moisture content of most woods is in the 7% to 10% range when it leaves our plant. The relative humidity in most interior spaces in the U.S is 30% to 40%. If this is true at your jobsite, this will keep the moisture content levels of your wood columns in an acceptable range. If humidity levels are above 50% or below 25%, it will adversely effect your columns and other woodwork. A rapid loos of moisture from the wood, can cause checking or splitting, and this could even happen at the glue seams making them appear to be opening. Conversely, it is also important that wood columns not be stored in very damp conditions. This will cause the wood to warp, swell, grain to raise, and may cause glue joint failure. Because of the nature of round wood columns, there is no room for eccentric movements caused by major moisture changes. The changes in wood caused by these moisture change issues are natural to wood products, and are a natural property of all woods. Therefore, these changes in wood due to these moisture issues are not a manufacturing defect and as such are not covered by the manufacturers warranty.
Therefore, we recommend that you take care with moisture conditions in the environment that the columns will be stored or installed to maintain acceptable moisture levels, and that you avoid wide swings in the moisture content. We also recommend that you finish the columns as soon as possible after arrival, especially quickly for stain grade columns. Columns must be stored in a well ventillated area with acceptable moisture content as described above, and not subjected to severe moisture conditions. Be aware that heating systems may cause very dry air, similar to exterior cold dry air conditions. Take care when turning on the heating system for the first time at your job site, as this may drop moisture content too quickly, and to too low a level. Thank you for your diligence in following these instructions for proper product storage and care.
Installation of Plinth/Base and Capitals
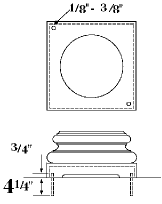
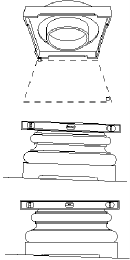
Fiberglass plinths, aluminum plinths, or lead plates must be used to provide ventilation and act as a barrier against concrete or other masonry.
Installing the Shaft:
Trimming Shaft to Exact Height:
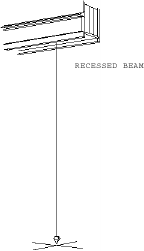
To determine the overall height of the column, measure the opening distance from the finished beam to the finished floor at the center of where the column will stand. Be sure to measure ALLof the column locations, as opening heights are frequently different due to variations in the deck.
BE SURE TO ACCOUNT FOR THE HEIGHT OF THE PLUG FOR COLUMNS WITH ORNAMENTAL CAPITALS
Be sure to include capital (with plug for ornamental capitals), base and plinth when determining desired shaft length to fit opening. Measure from the upper most top cove on the column shaft along the edge of at least four staves around the circumference of the column shaft to obtain an accurate bottom trim line.
The end grain on the bottom of a column shaft field trimmed to length must be coated with two coats of oil based paint prior to installation.
Attachment of Ornamental Capitals
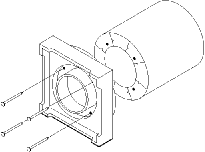
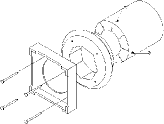
Ornamental Capitals are load bearing and are cast from a weatherproof resin composite, non-loadbearing capitals, for interior use only, are cast from plaster and are supplied with a load bearing plug. Use Enclosed Plug When Installing. (The Loadbearing plug should be approximately 1/8″ taller than capital.) After completely covering all areas of the capital (both inside and outside) with a high quality oil based paint, position capital over loadbearing plug and onto column shaft. Pre-drill through capital and plug at an angle so that the attachment fastener will intersect the shaft Caulk the area where the capital meets the shaft. Attach the capital using non-corrosive screws. Install the lead flashing on top of the capital, and turn the edge of the flashing down over the edge of the capital to act as a drip edge.

Attachment of Wood Capitals
Pre-drill through shaft and into capital for fasteners. Apply caulk to the area where the capital and shaft intersect. Secure capital to shaft using non-corrosive screws.
Finishing Instructions
Nailing
Non-corrosive (stainless steel or aluminum alloy) nails and fasteners should be used on Redwood exposed to moisture. Top quality double hot-dipped galvanized nails will also perform well if the galvanized coating is not damaged during nailing. Experience indicates that nails galvanized by other processes are unsatisfactory, and like ordinary corrosive nails, can react with Redwood’s natural extractives when wet to cause stain streaks.
The end grain on the bottom of a column shaft field trimmed for length must be sealed prior to installation with two coats of a high quality oil based paint.
All interior and exterior surfaces of plaster composition capitals must be coated with two coats of a high quality based primer.
Reassembly of Split Column Shafts
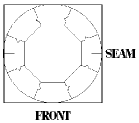
Keep all seams at 90 degrees to front view. Halves will arrive marked. Be very careful to keep proper halves together. Use a quality resourcinal adhesive for joining wood pieces and a quality polyester resin for fiberglass pieces.

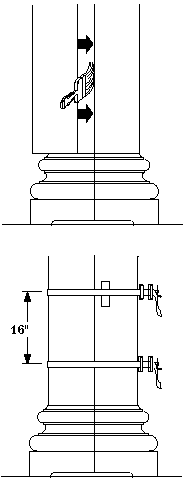 Caulk with 20-year silicone caulking underneath halves, then place them on the base and align splines leaving a gap between halves. Fully cover joints of both halves inside gap with resourcinal adhesive. Be certain there is complete wood-to-wood contact along joint.
Made in Half Ornamental Capitals
